
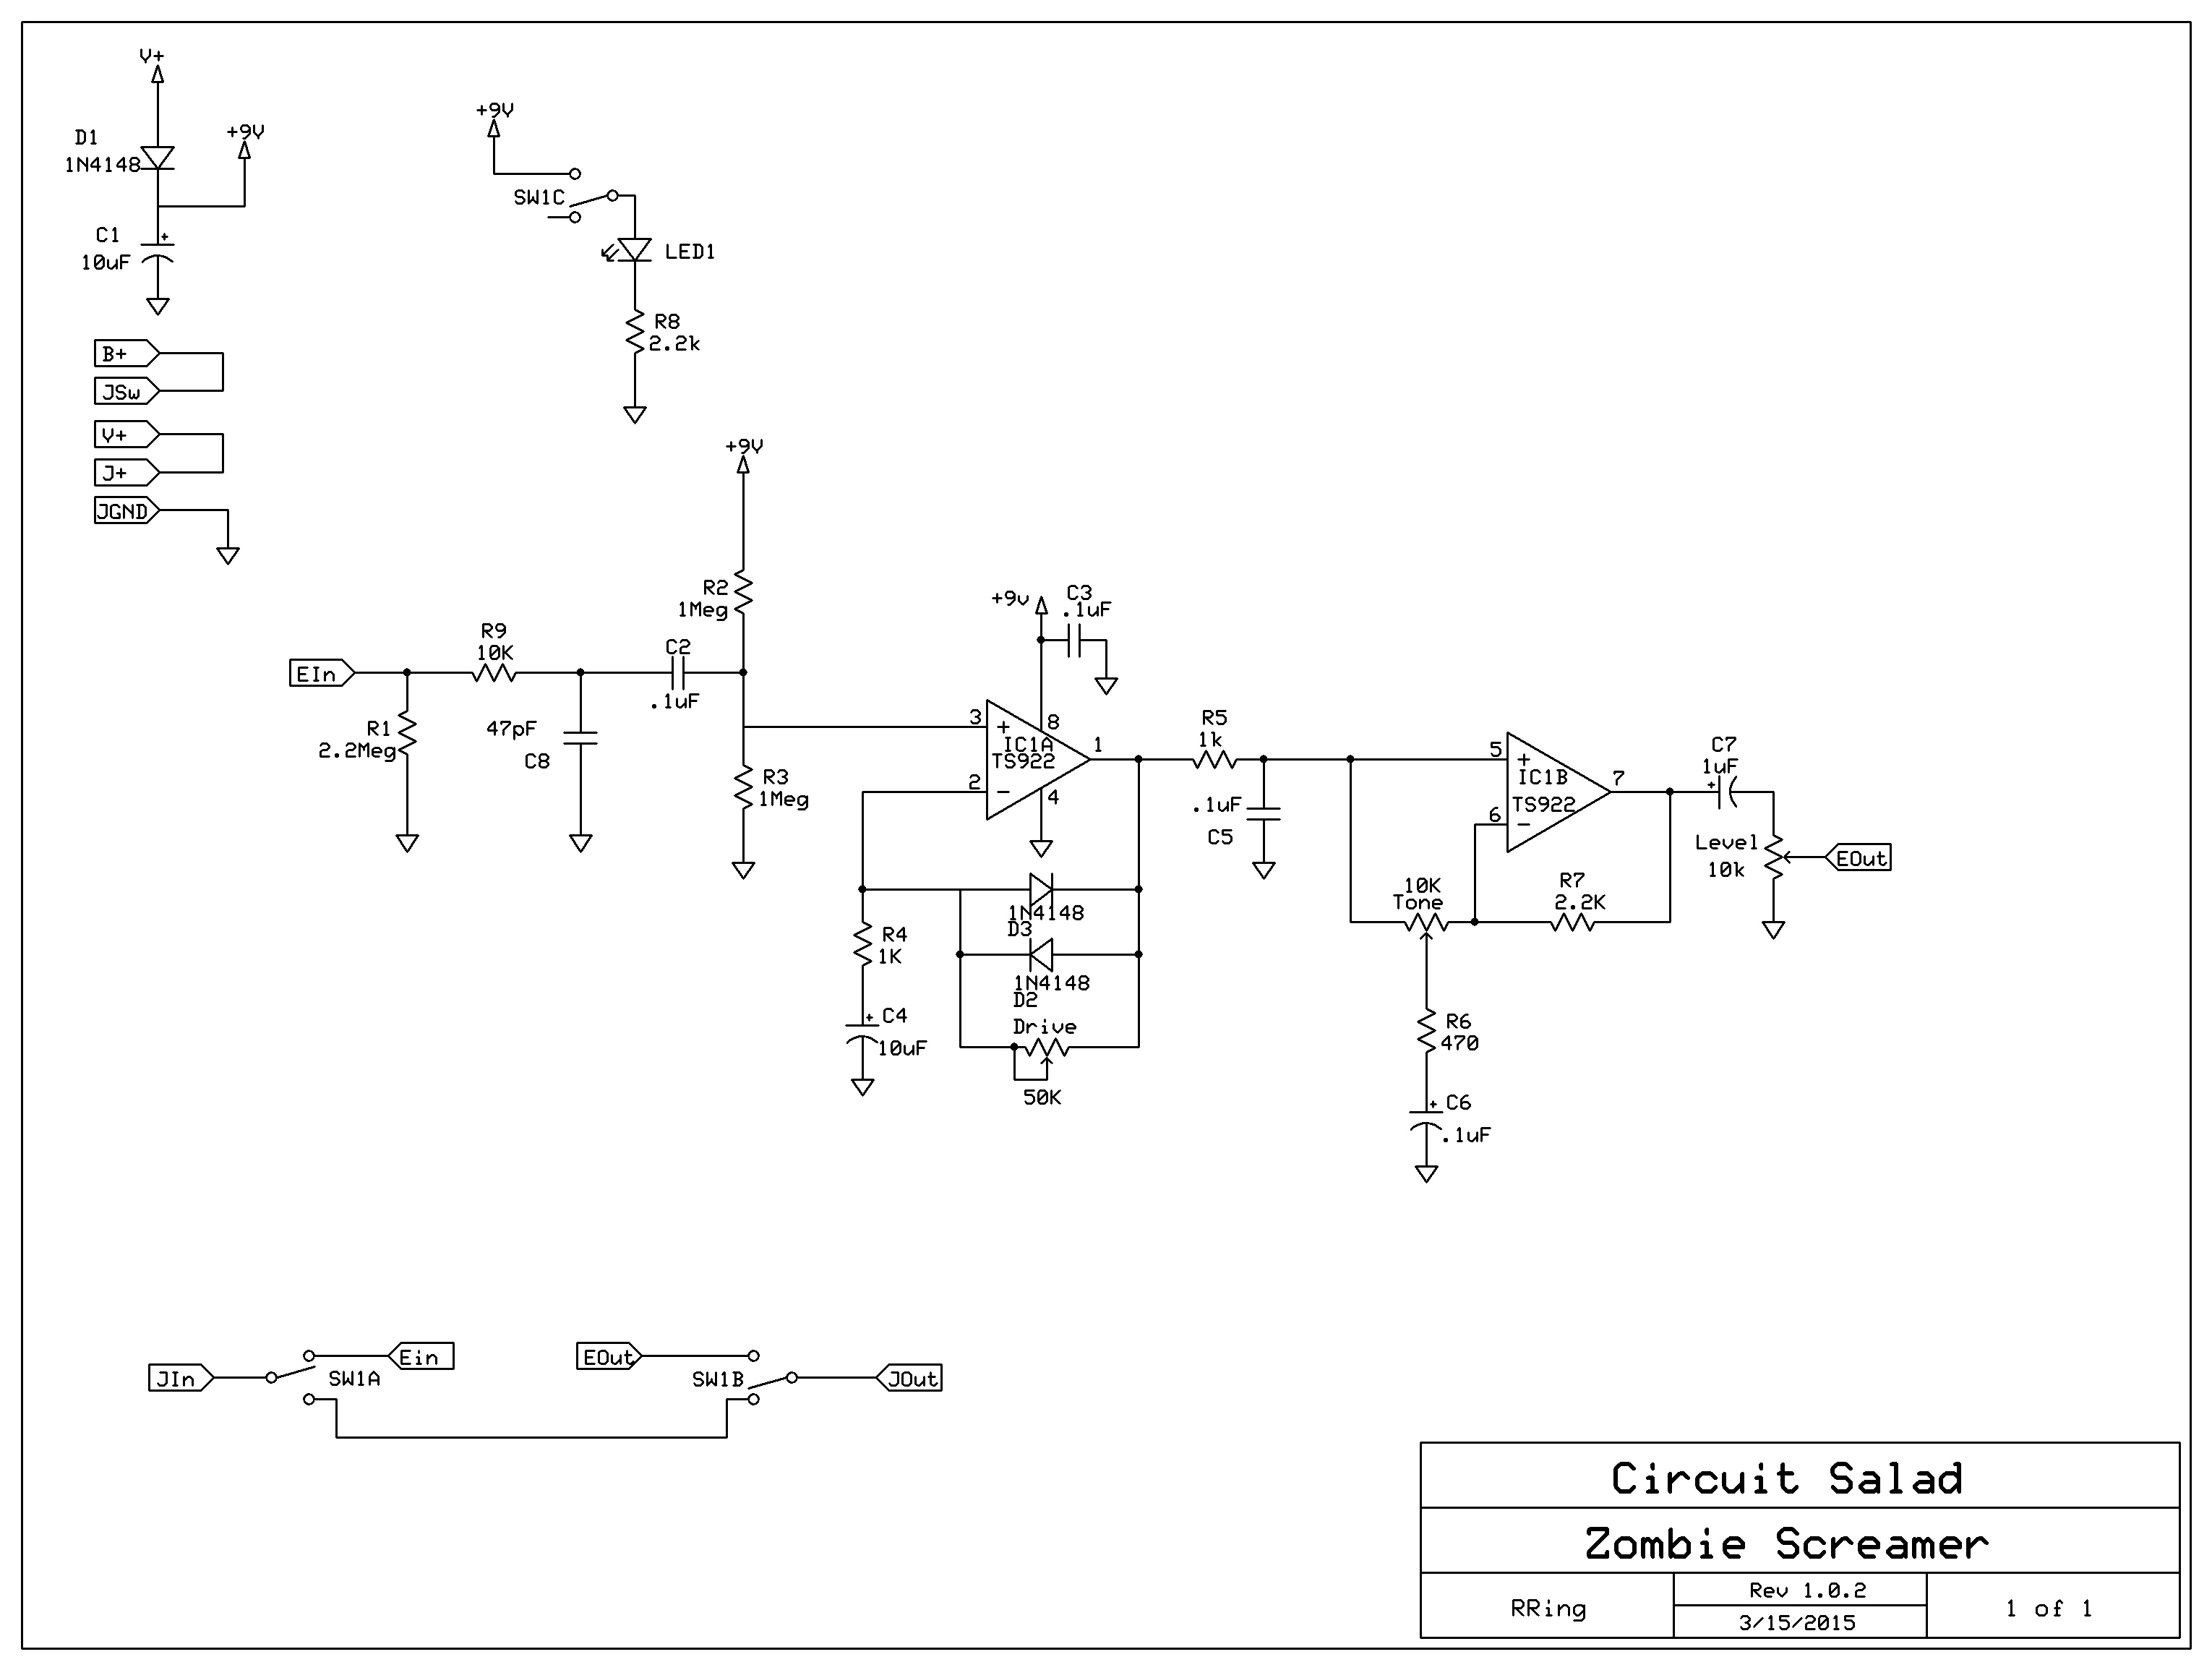
I have gone to 1N4148 clipping diodes and made a couple of other minor tweaks to the circuit. Overall I am happier with the sound particularly the broader range of partial clipping (more like an overdriven amp) in the lower gain settings.

Schematic
I have gone to 1N4148 clipping diodes and made a couple of other minor tweaks to the circuit. Overall I am happier with the sound particularly the broader range of partial clipping (more like an overdriven amp) in the lower gain settings.
Schematic

A lot of little changes- I’ll have to breadboard it and do an AB with my ZS. Thank you
How can I email you? We met at Sherwood’s one day and I have a question about the Kool-Verb and reverb in general.
You may have answered this somewhere but I didn’t find it – how do you etch and finish your enclosures? They look great.
Thanks…it took me about 2 months to come up with a reliable process. I screw up about 1 in 10 now, but the first 5 or 6 were failures. My overall point is: it’s very doable but takes some practice. It so easy for me now ..I will etch an enclosure for a prototype..just for the hell of it.
I use a laser printer and iron at hottest temp to fuse a resist onto the the enclosure.
I assume you can create an image in a paint program…etc, reverse it and print the resist…but I can give more detail about that if you are not familiar with this step.
I etch with slightly warm ferric chloride and a sponge. The inlay is done with protec powder fishing lure paint. I carefully scrape the powder into the etch and heat the enclosure to melt it into the etch for the inlay.
I have a particular printer I use(cheap thank god!) with specific settings, and refined technique for the etching gently using a sponge(important).
Also the inlay requires three or four applications of the paint with cleaning excess in between.
None of this is difficult but the devil is in the details..so if you are willing to go to the effort to try…I am glad to give you all the advice and tips I can.
The amount of info I have given is enough to get the idea but not to execute a good etch
General idea is what I was interested in so thanks.