
A resistive bridge type SWR meter doesn’t actually measure SWR – it measures impedance mismatch or impedance(however you want to look at it). SWR is calculated by the ratio of two volatges on the bridge. The SWR and impedance only relate correctly if the bridge impedance and feedline impedance are the same(50 ohms typically). A resistive bridge works fine but you can do the same thing with a simple resistive divider. When using a divider, you can use any value resistor you want(50 ohms in my design) and as long as you know the characteristic impedance of your feedline, you can correctly calculate the results with any feedline impedance (not just 50 ohm coax).By measuring three voltages across the divider(Vs, Vr and Vz), one can easily derive: total Impedance, resistive impedance, reactive impedance, SWR, and return loss. A resistive bridge is most accurate when mismatched, but the resistive divider is most accurate when match is optimal. So ask yourself would rather know more accurately what’s happening between SWRs of 1:1..to 2:1 or when it’s 3:1 or greater? The only drawback of this method is that you cannot determine the sign of reactance(capacitive or inductive) directly, but you can derive all of the magnitudes. This is because when you convert the voltages to DC values by means of diode detectors, all phase information is lost.
I decided to build a small and reasonably simple antenna analyzer for 1 -30Mhz. I wanted it to provide accurate measurement of SWR, Total Z, R and X of the ANT. Simplicity in operation and moderate power consumption were also design goals. The schematic below is what I came up with.
Preliminary Schematic(not built yet)
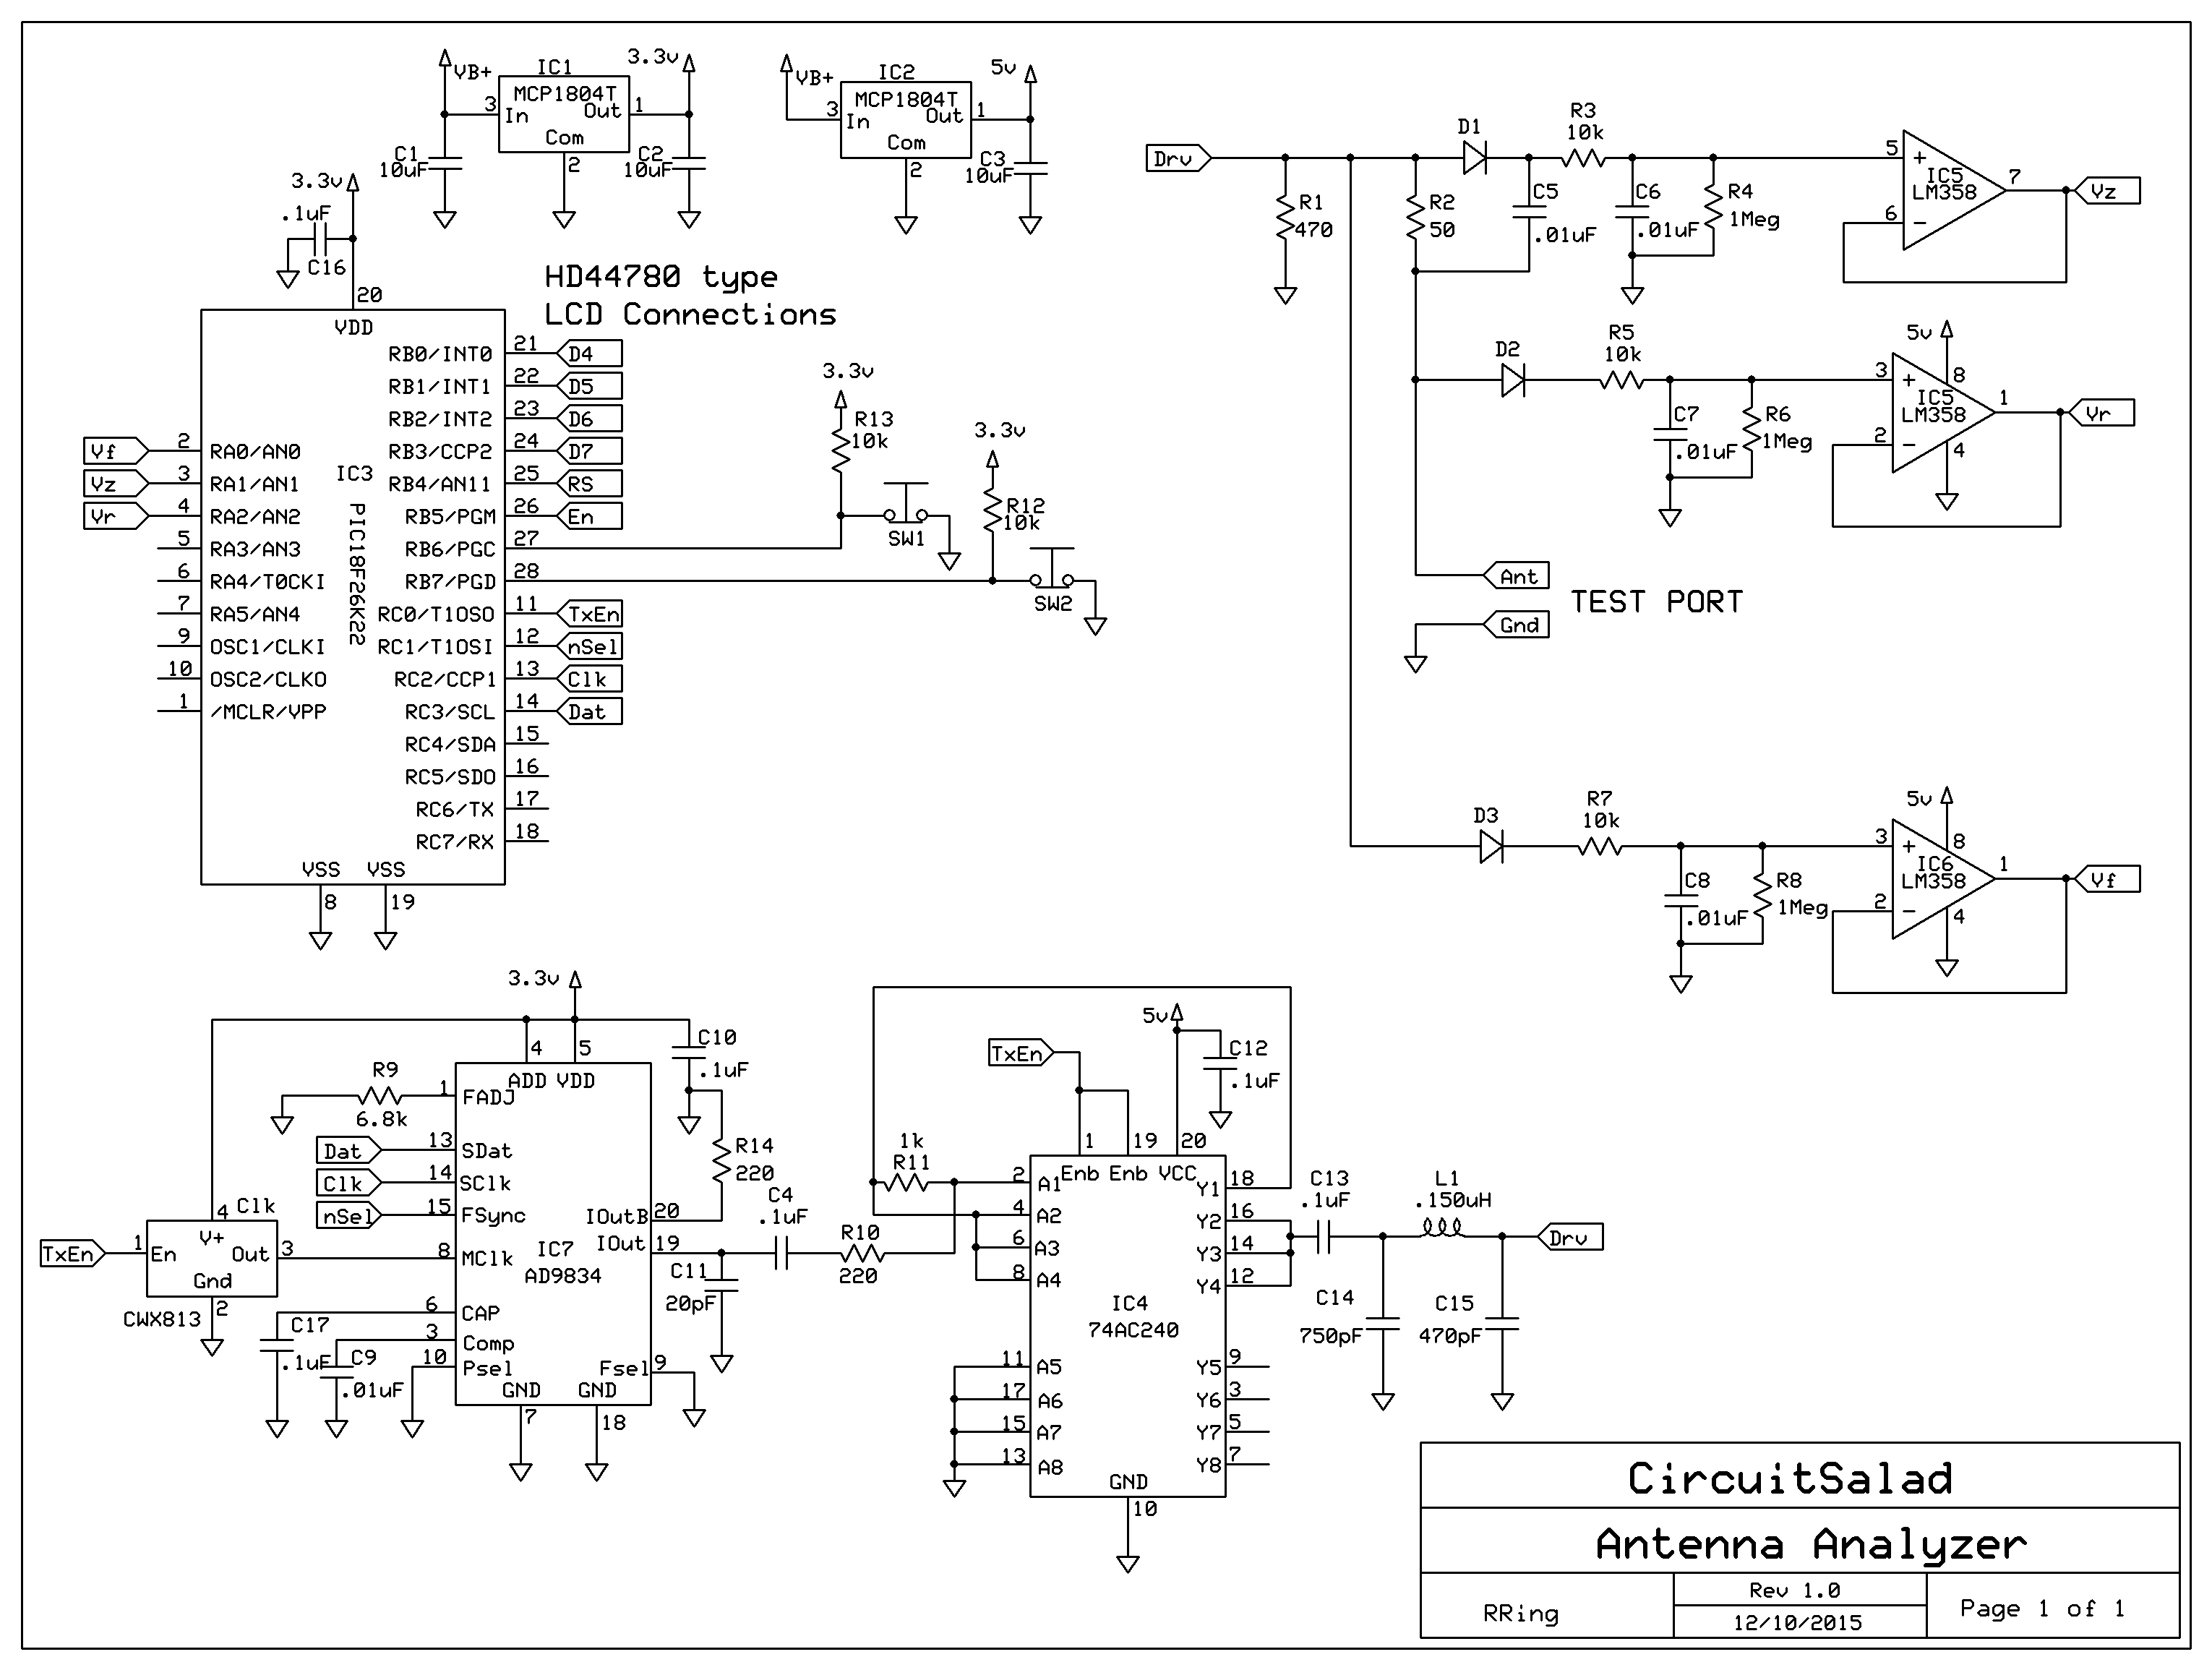
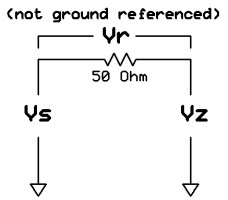
I have etched a circuit board and will build the analyzer in early 2016. I will update the post as I make progress. Expect some values in the schematic to change. Below is a discussion of the math required to derive all of the analyzer measurements. Vr requires a floating measurement, Vs and Vz are ground referenced.
Diagrams for Analysis
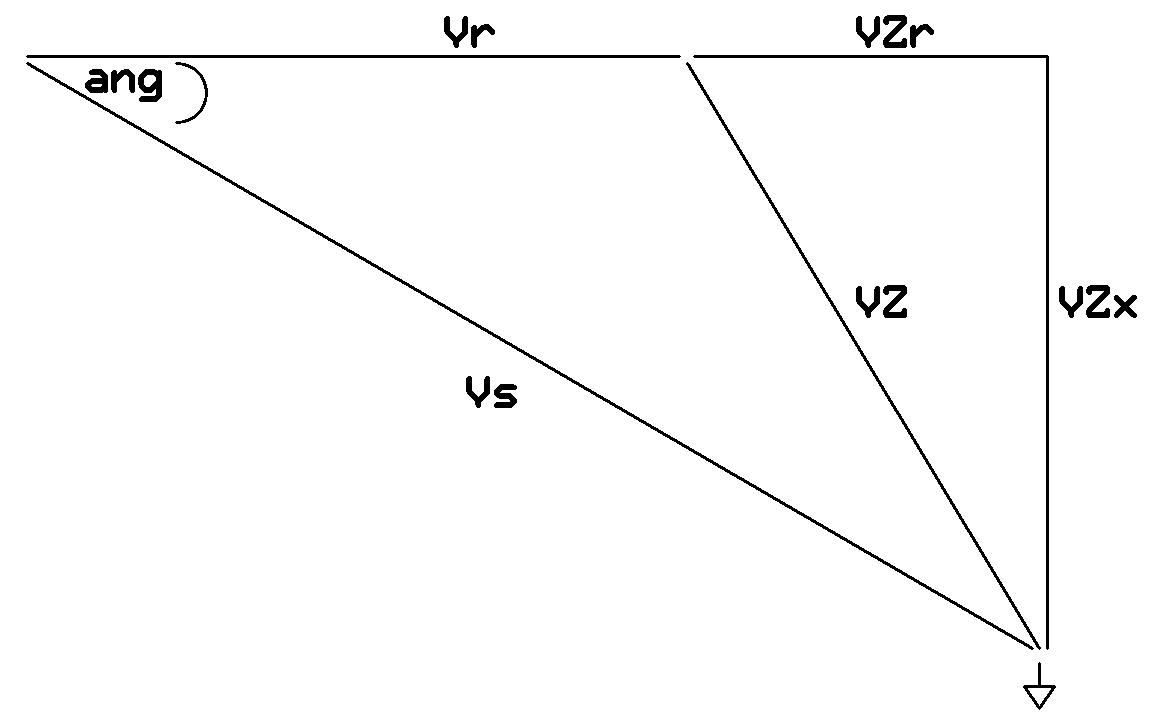
Using the Voltages Vs, Vr and Vz, one can create a triangle related to the classic power factor triangle where the hypotenuse(Vz) can be seen to be shared and the cos(ang) allows one to find the reactive and real components of the impedance. One is required to find the cos(ang) using only the lengths of the sides of the Vz, Vr, Vs triangle. These values are the measured voltages from the diode peak detectors shown in the schematic. The law of cosines provides the solution.
cos(ang) = (Vs²+Vr² – Vz²)/ (2* Vs* Vr)
Using node voltage equations, the following relationships can be derived from the simple divider shown above. Note that the triangle legs:Vs, Vr, VZ , VZr and VZx are synonymous with Zs, R, Z, Zr and Zx respectively
The total impedance seen across the signal source (Zs): Zs = R*Vs/Vr
The absolute value of the complex impedance seen across the load connections of the resistive divider(Z): Z = R*Vz/Vr
The real part of the load impedance (Zr): Zr = Zs*cos(ang) – R
The complex part of the load impedance (Zx): Zx = SQRT(Z² – Zr²)
With these equations we now have total load impedance Z, the resistive component Zr, and the magnitude(but not sign) of the reactive component Zx.
If we know Zr and Zx, we can calculate the SWR and return loss as well:
First we calculate Γ: Γ = SQRT( (Zr-R)²+Zx²)/SQRT( (Zr+R)²+Zx²)
Now SWR: SWR = 1+Γ/1-Γ and return loss: return loss = -20 log Γ
Note: R used in Γ calculation is the characteristic impedance of the feedline not the R used in the divider (in my case they will be the same: 50 ohms).

+1
Thanks V
I used a resistive bridge for years – In Jan 2015, I built a K2 kit…and noticed that when I switched the bridge out of the circuit (operate mode), it caused an impedance “bump” and a high-current fault in my K2. Apparently in wiring around the bridge, the wires did not maintain the 50 ohm characteristic impedance of the transmission line. The bridge was very accurate – my ability to maintain the Z of the line was not! I did not think this would be a problem in the HF bands. I went back and looked at some of the SWR bridges in my junk box (dating to the “Moni-Match” days) and the too were a little “bumpy”. I ended up building an in-line device at the bottom of this link: http://ea4nz.ure.es/swrmeter/swrmeter.html
Curious how yours worked out when switched to operate?
Hi,
Thanks for posting this and all of the other projects!
I’m curious to learn if you finished this project, and your results.
Rich – W6BOT
well actually I etched a board but did not put it together yet…I left my job and started a small company and got really busy! I do plan on finishing it…because I want a small antenna analyzer to bring with me camping…I will definitely post about my progress.